Posts
My thoughts and ideas
Welcome to the blog
My thoughts and ideas
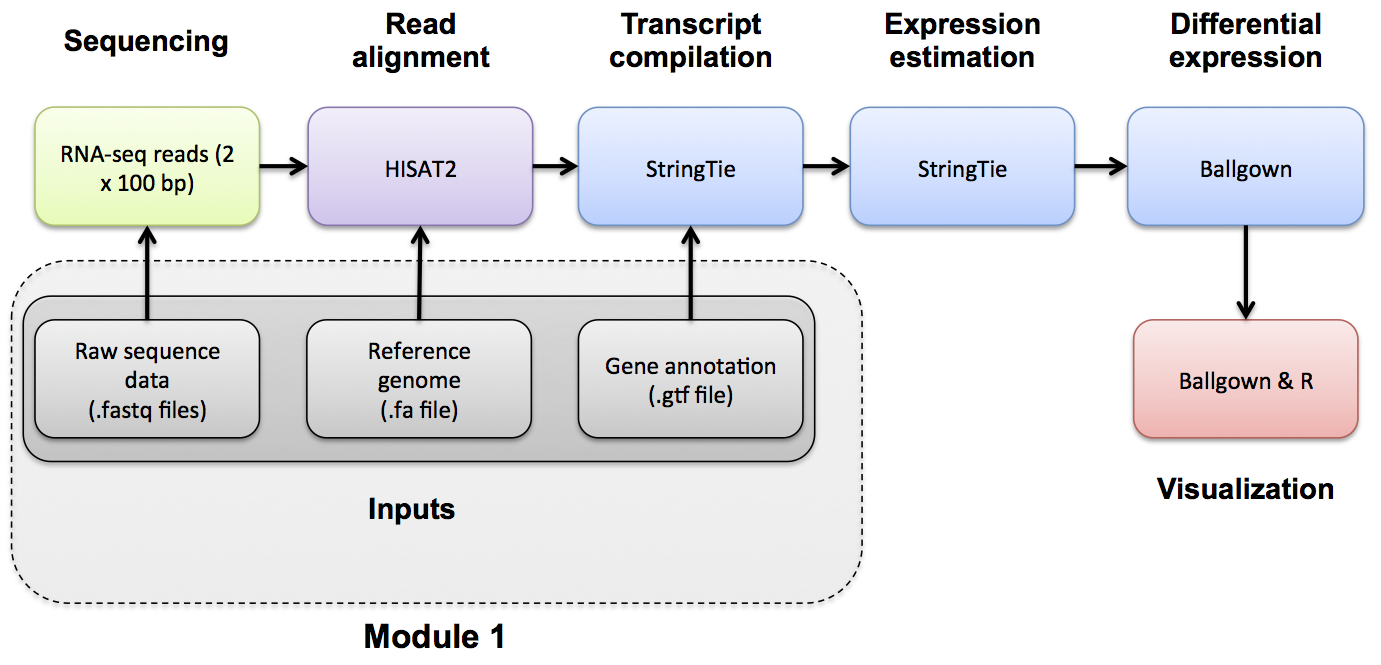
Introduction to bioinformatics for RNA sequence analysis
If you want a refresher on indexing, we have made an indexing mini lecture available.
Create a HISAT2 index for chr22 and the ERCC spike-in sequences. HISAT2 can incorporate exons and splice sites into the index file for alignment. First create a splice site file, then an exon file. Finally make the aligner FM index.
To learn more about how the HISAT2 indexing strategy is distinct from other next gen aligners refer to the HISAT publication.
cd $RNA_REFS_DIR
hisat2_extract_splice_sites.py $RNA_REF_GTF > $RNA_REFS_DIR/splicesites.tsv
hisat2_extract_exons.py $RNA_REF_GTF > $RNA_REFS_DIR/exons.tsv
hisat2-build -p 4 --ss $RNA_REFS_DIR/splicesites.tsv --exon $RNA_REFS_DIR/exons.tsv $RNA_REF_FASTA $RNA_REF_INDEX
ls
Perform a visual survey on the contents of your refs directory. What is the source/purpose of each file.
[OPTIONAL] To create an index for all chromosomes instead of just chr22 you would do something like the following:
WARNING: In order to index the entire human genome, HISAT2 requires 160GB of RAM. Your AWS instance size will run out of RAM.
#hisat2_extract_splice_sites.py Homo_sapiens.GRCh38.86.gtf > splicesites.tsv
#hisat2_extract_exons.py Homo_sapiens.GRCh38.86.gtf > exons.tsv
#hisat2-build -p 4 --ss splicesites.tsv --exon exons.tsv Homo_sapiens.GRCh38.dna_sm.primary_assembly.fa Homo_sapiens.GRCh38.dna_sm.primary_assembly