Logging into Course Compute
We currently offer two options for completing the hands-on components of this course including Amazon Cloud (AWS) and Docker images.
Using cloud computing (AWS) to complete this course involves two major components: (1) Launching an instance on the cloud (essentially renting a virtual computer by the hour and turning it on) and (2) logging into that instance.
Using Docker involves running a precompiled image locally on your computer. For specific instructions on how to use each, choose one of the options below:
Compute Options
Using AWS
Covered in this section: logging into AWS EC2 console, starting an instance from the course AMI and configuring it in the console (select instance AMI, instance type, instance details, storage volumes, tags, security group, and key pairs).
Launching an AWS instance
In the previous section Introduction to AWS we reviewed fundamental concepts of cloud computing and some of the jargon and features specific to AWS. In this section we will learn how to launch an instance specifically for this course.
In order to launch your own instance you will either need to use your own personal AWS account, an account provided through your institution OR if you are taking a live version of this course you will be assigned an AWS account using the IAM system. The following instructions are used for a live version of this course, but the process would be essentially the same when using a personal or institutional account.
- Once your EC2 instance is up and running, make note of its IP address.
- Instructions for logging into this cloud instance (including instructions for Windows systems, if applicable) can be found below.
- This will ONLY occur once we are in the classroom as it costs money to have these servers running.
- Each student will launch their own instance from a preconfigured AMI.
Briefly the process for launching an EC2 instance for this course involves these steps:
- Login to AWS using the specific url and credentials (user/password) you were provided (or our own AWS account).
- Search for and select EC2 to access the EC2 console.
- Make sure that you are in the N. Virginia region
- Select Launch Instances.
- Name and tags: Name your instance (e.g., Firstname_Lastname).
- Amazon Machine Image: Search for “cshl-seqtec-2025” in My AMIs and Select.
- Instance type: Select “m6a.xlarge” and then “Next”.
- Key pair (login): Choose an existing key pair (e.g., cshl_2025_student) or create a new one and store it somewhere safe.
- Network settings: Choose existing security group called “SSH/HTTP/Jupyter/Rstudio - with outbound rule” (or create one with SSH and HTTP access).
- Configure storage: Make sure that you see two volumes.
- Advanced details: Select “Termination Protection: Enable”.
- Summary: Review and then Launch instance.
- View all instances and wait for your instance to finish initiating.
- Find your instance in console and select it, then hit connect to get your Public IP address (EC2 Instance Connect).
- Login to the instance as described below.
Logging in to your own AWS EC2 instance
- In order to log in to your instance, you will need a security certificate or “key file”.
- You will be provided with a key file called: “cshl_2025_student.pem” (for Mac/Linux users) OR “cshl_2025_student.ppk” (for Windows/PuTTy users).
- NOTE: It is very important that you use only your own instance (ip address or dns name) when logging in! If two people log into the same Amazon machine they may have collisions as they try to write files to the same places and this will cause errors and confusion.
- On the AWS cloud, we are going to use the default username: “ubuntu”
Logging in to AWS with Terminal (Mac/Linux)
- First open a Terminal session (Applications -> Utilities -> Terminal))
- Make sure the permissions on your certificate are secure. Use chmod on your downloaded key file:
chmod 400 cshl_2025_student.pem
- To log in to the node, use the -i command line argument to specify your certificate:
ssh -i cshl_2025_student.pem ubuntu@[your ip address or dns name] # [your ip address or dns name] is the public IP address of your instance
-i selects a file from which the public key authentication is read. ubuntu is the name of a user on the system you are logging into (a default user of the Ubuntu operating system). [your ip address] is the address of the linux system on Amazon that you are logging into. Instead of ip address you can also use a public dns name.
Logging in to AWS with Powershell (Windows)
Open a PowerShell session , and follow the steps as listed in Logging in to AWS with Terminal.
Logging in to AWS with PuTTy (Windows)
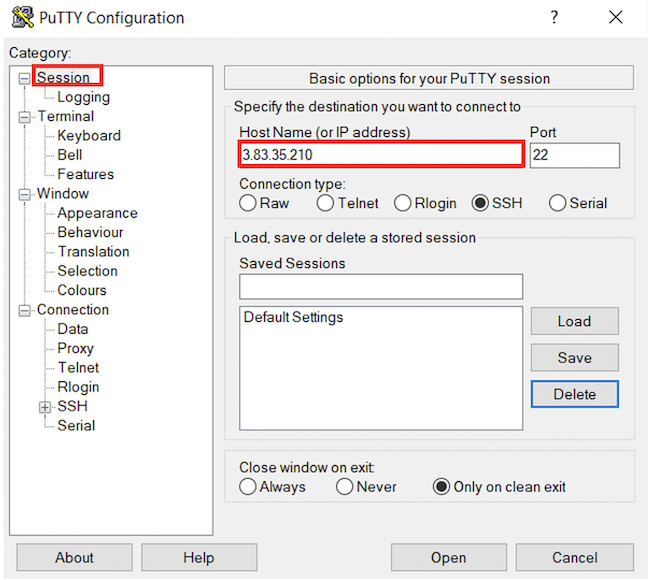
To configure PuTTy, start PuTTy and do the following:
- Fill in the “Host name” field with your ip address.
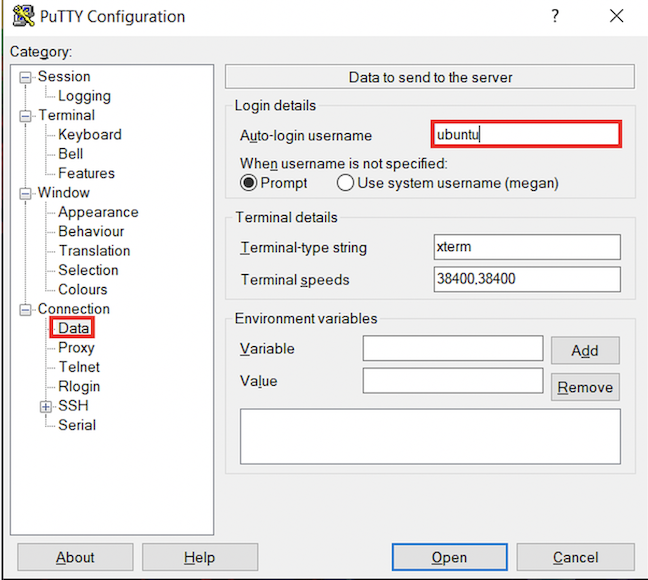
- In the left hand categories,under the Connection category choose Data. In the auto-login username field write
ubuntu.
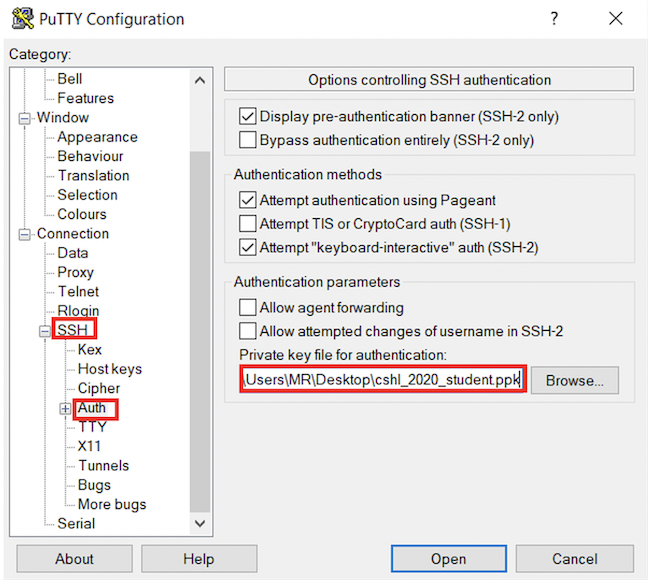
- In the left hand categories, in the Connection category next to SSH click on the +. Click on Auth. In the private-key file for authentication field, hit browse and find the
cshl_2025_student.ppkcertificate that you downloaded above.
- In the left hand categories, click on Session. In the Saved Sessions field write Amazon node and click save.
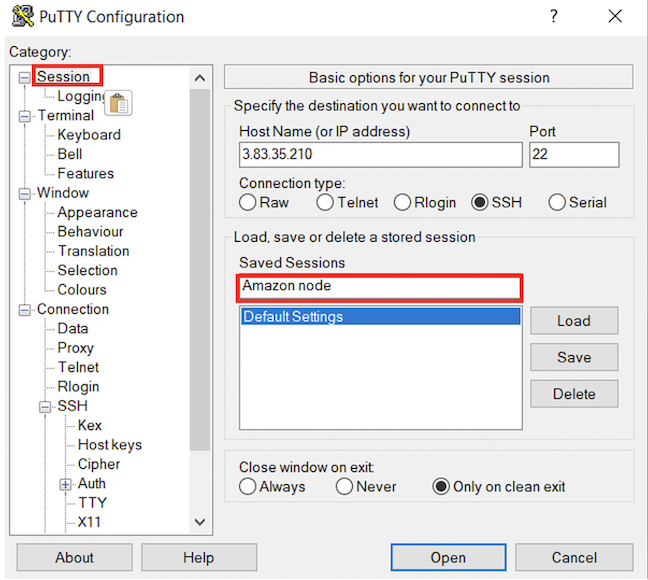
- Now that Putty is configured, all you have to do is start putty and double-click on “Amazon node” to login.
Copying files to your computer from AWS
- To copy files from an instance, use scp in a similar fashion (in this case to copy a file called nice_alignments.bam):
scp -i cshl_2025_student.pem ubuntu@[your ip address or dns name]:nice_alignments.bam .
- Everything created in your workspace on the cloud is also available by a web server on your cloud instance. Simply go to the following in your browser:
https://[your ip address]/ or https://[your dns name]
File system layout on AWS instance
When you log in, you will notice that you have one directory already: “workspace”.
- The “workspace” directory is where we will keep all files and analysis results for this course.
Uploading your data to the AWS instance
If you would like to upload your data to the AWS instance, use the example scp command below. Be sure to replace the variables below with the local path to your data, MY_DATA, and the amazon instance IP, YOUR_IP_ADDRESS.
scp -i cshl_2025_student.pem __MY_DATA__ ubuntu@[your ip address or dns name]:/
Doing this course with AWS outside of a workshop
If you are trying to do this course on your own using the online materials only, of course an AWS EC2 instance has not been set up for you. If you have access to an AWS account though you can can start with the same Amazon AMI we use to create instances for each student. Currently this is:
Name: cshl-seqtec-2025 available in the US East, N. Virginia region (us-east-1).
We typically use an instance type of m6a.xlarge. For detailed instructions on how we created the AMI and configure each instance, please refer to the AWS Setup page.
Basic introduction to your AWS EC2 instance
Once you are logged into your EC2 instance using ssh, the following commands can be used to explore basic information about the machine
#How are storage volumes mounted?
lsblk

#How much storage space in being used for various mount points?
df -h

#Detailed description of hardware
lshw

#See active resource usage right now with "top".  Use "1" to see all CPUs individually.  Use "q" to exit
top
Using Docker
We have built a docker image with all necessary software tools installed to complete this course. This allows the hands-on exercises to be perfomed on your own desktop or laptop or anywhere that has docker installed. The following commands can be used to download and run this image as an interactive docker container.
First you will need to install docker. Typically this involves installing Docker Desktop. Once installed, start docker, and open a terminal application. Explanations of how to do this are detailed above in the Using AWS section. At the terminal you can test your docker installation is working/running with docker --help. Once you have docker working you can use the following commands to download, set up, and run the rnabio image.
- Pull the image to your local Docker client from the griffithlab repository:
docker pull griffithlab/rnaseq-toolkit:latest - Setup a local workspace directory for the RNAseq course. If you change the path or command used here in Step 2, make sure to update the path to the workspace directory accordingly in Step 3.
mkdir -p /tmp/rnabio-workspace - Initialize a Docker container using the image we pulled above. -v tells Docker to mount our workspace directory within the Docker container as /workspace. You’ll see in the RNAseq course /workspace is the base directory for nearly all commands and steps. Note: we are running this docker container interactively, opening port 8080, and entering it at a bash shell prompt.
docker run -it -p 127.0.0.1:8080:8080 -v /tmp/rnabio-workspace:/workspace griffithlab/rnaseq-toolkit:latest
Optionally, to enable Docker functionality within the container (for running other bioinformatics containers):
# Mount the Docker socket to enable host Docker engine access
docker run -it -p 127.0.0.1:8080:8080 -v /tmp/rnabio-workspace:/workspace -v /var/run/docker.sock:/var/run/docker.sock griffithlab/rnaseq-toolkit:latest
The docker session should now be ready for the Unix tutorial and practical exercises.